

Best Bird Mesh Wire Supplier: Top-Quality Solutions for Your Needs
2026-08-19
Finding a reliable bird mesh wire supplier can feel like searching for a needle in a haystack, especially when durability and precision matter most. At Topfencesolar, we don’t just sell mesh—we engineer solutions that keep birds out and your projects on track. Whether you're securing a solar farm, protecting a garden, or reinforcing a commercial structure, the right wire mesh makes all the difference. In this post, we'll dive into what sets true quality apart and why thousands of buyers trust Topfencesolar for their toughest challenges. Curious what you've been missing? Read on.
Why Galvanized Mesh Outlasts Cheaper Alternatives
The secret lies in the zinc coating, which forms a tight metallurgical bond with the steel underneath. Instead of simply sitting on the surface like paint, the zinc becomes part of the outer layer of the wire. When moisture and oxygen attack, the zinc sacrifices itself first, corroding slowly while the steel core remains intact. Even if the coating gets scratched during installation, the surrounding zinc continues to protect the exposed area through a process called galvanic action. Cheaper mesh often relies on thin electroplated coatings or bare steel with a quick rust-inhibiting spray, which wears off within months and leaves the wire vulnerable to pitting and weakening.
Another advantage is how galvanized mesh handles real-world stress. Fencing and mesh panels flex constantly from wind, animal pressure, or ground movement. A thin, brittle coating will crack under that repeated motion, letting moisture seep into the hairline fractures. Hot-dip galvanizing, by contrast, produces a thicker, more ductile layer that moves with the steel. The zinc also forms a hard, abrasion-resistant patina over time, which further slows down corrosion. That is why you see decades-old galvanized fences still standing straight while cheaper alternatives show sagging, rust bloom, and snapped wires after only a few seasons.
Cost comparisons often ignore the long game. A roll of uncoated or lightly coated mesh might look attractive on the shelf, but you will pay for it again in replacement labor, lost livestock, or failed security barriers. Galvanized mesh may cost more upfront, yet its lifespan regularly exceeds two or three times that of the cheaper option. In coastal or high-humidity areas, the gap widens even further. When you factor in the reduced need for painting, patching, and full replacement, the galvanized choice becomes the more economical one by a wide margin.
Custom Cut Sizes That Fit Any Aviary Layout
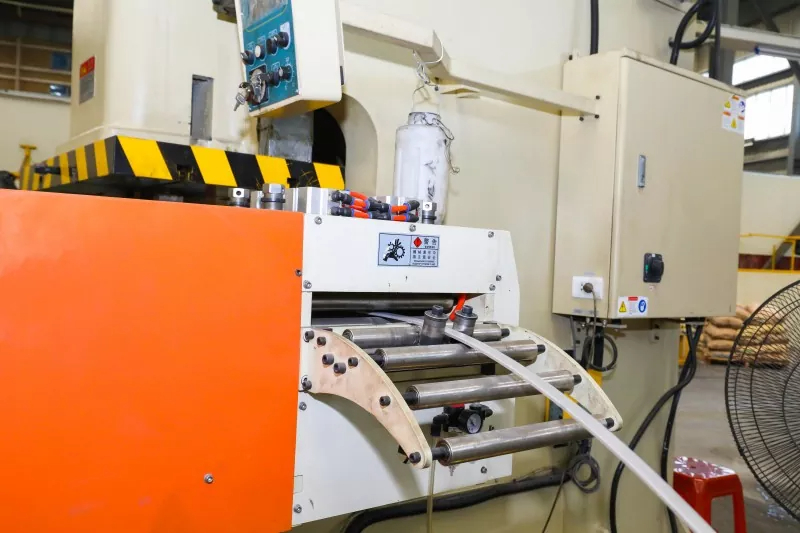
Off-the-shelf aviary panels rarely account for sloping ceilings, odd corner angles, or the space left around a support beam. We cut mesh and framing to your exact measurements—down to the half-inch—so you don't have to bend, overlap, or leave awkward gaps. Whether you're building around a window, a drain pipe, or an existing shelf, the pieces arrive shaped for your specific layout, not a generic rectangle.
This matters most when you're piecing together an indoor flight cage or an outdoor walk-in structure. A template you sketch on paper or mark with tape becomes the cutting guide, and we translate those lines into clean, burr-free edges that meet flush at every joint. You can mix widths on the same wall, step down panel heights to follow a roofline, or order a single panel with a notch cut out for a branch that pokes through.
If you change your mind mid-build or discover a stud where you wanted a door, you're not stuck with a pile of wrong-sized stock. Send a revised sketch and we'll recut only the pieces that need adjusting. That kind of flexibility means the aviary fits the room, not the other way around—and you spend less time forcing hardware into place.
Real Project Insights from Backyard Coops to Flight Cages
Most backyard coop plans look neat on paper until a raccoon tests the latches at 2 a.m. or the first heavy rain turns the run into a mud trough. One repeated lesson from real builds is to skip the flimsy barrel bolts that come with kits and use spring-loaded gate latches or carabiners on every access point. Raising the coop floor at least fourteen inches off the ground also cuts down on damp bedding and gives rats fewer hidden corners.
Flight cages for quail, pheasants, or finches bring a different set of headaches. The biggest one is usually headroom: birds spook upward, so a cage under six feet tall leads to scalped heads and broken necks. Builders who have dealt with it recommend solid roofs instead of wire on the top panel, softer netting in one corner, and planting a few dense shrubs outside to give birds a visual block. Door placement matters more than it seems, too — a narrow entry at one end makes catching birds slower and more stressful than a wide door near a corner where they naturally bunch.
Choosing the Right Wire Gauge to Stop Predator Break-Ins
Most people grab whatever welded wire is on sale, then wonder why a raccoon ripped through it in under a minute. The truth is, gauge matters more than the type of coating or the brand name. For anything meant to keep out determined predators like foxes, coyotes, or even a strong dog, you need at least 14-gauge wire with openings no larger than 2 by 4 inches. Anything thinner—like the common 16-gauge or 20-gauge poultry netting—is basically a suggestion, not a barrier. A raccoon can bend 16-gauge with its hands if it gets a good grip, and a coyote will just lean into it until the welds pop.
For ground-level runs and coop windows, step up to 12-gauge or even 1/4-inch hardware cloth if you're dealing with weasels or rats. These smaller predators don't need to tear a hole; they just squeeze through gaps that look harmless to us. Hardware cloth also holds its shape better when buried, which matters because most break-ins happen at the soil line, not through the middle of a panel. If you're wrapping a wooden frame, use fencing staples every four inches and double up the corners—that's where animals pry first.
One trick that saves money and frustration: buy 100-foot rolls of 14-gauge welded wire meant for goat or hog fencing. It's stiffer than chicken wire, cheaper than hardware cloth, and resists bending from a lunging predator. Check the welds before you install—give the wire a sharp twist at a few intersections. If any break, return the roll. A single failed weld turns a solid wall into a zipper, and predators learn that fast.
Installation Shortcuts That Don't Sacrifice Safety
Pre-assembling brackets and measuring twice before drilling often feels like extra work, but these habits actually create the fastest path to a secure finish. Instead of rushing to mount a heavy shelf or fixture, take a few minutes to mark stud locations with painter's tape and transfer hole positions from a paper template. This approach lets you spot alignment issues before the first hole is cut, so you avoid patching drywall or repositioning anchors later. A cordless drill with a depth stop set to the screw length is another underrated shortcut: you'll sink fasteners to the right depth every time without risking a blowout or stripping the hole.
Using pre-sized anchors and self-tapping screws removes the guesswork from hanging items on hollow walls or metal studs. Rather than trying to force a generic wall plug into an undersized hole, match the anchor to the wall type and the load rating printed on the package. Many modern anchors have an integrated collar that prevents over-insertion, so you can drive them quickly without checking after every turn. For ceiling-mounted fixtures, a temporary hook or second pair of hands can hold the piece while you secure the first two fasteners — this simple trick keeps the weight off the wiring and your arms, letting you finish the install in half the time.
Labeling and pre-cutting wire or pipe lengths on the floor before climbing a ladder is a safety-minded shortcut that many pros rely on. It's tempting to measure, climb, cut, descend, and repeat, but that sequence multiplies the chance of a slip or a bad cut. Instead, run a mock layout at ground level with masking tape marks, then transfer those measurements to the actual material. Keep a small organizer pouch on your belt for screws, anchors, and a mini level, so you never leave the work area to fetch a forgotten part. These small preparation steps don't feel like shortcuts at first, yet they consistently reduce the number of times you're off-balance or working with one hand while the other holds a loose component.
What Owners Notice After Years of Harsh Weather Exposure
The first thing most owners spot is a dull, chalky film spreading across the siding or trim. It's not just dirt—it's the paint or stain slowly breaking down under season after season of UV rays, freeze-thaw cycles, and driving rain. Run a hand over it and you'll get a fine powder on your fingers. That's the binder in the coating giving up, which means the surface is no longer shedding water the way it should. Left alone, that chalking turns into peeling, then bare wood or fiber cement starts soaking up moisture and swelling slightly at the edges.
Around windows and doors, the real trouble often hides in plain sight: cracked caulk lines, a slight gap where the frame meets the wall, or a window that suddenly needs a firmer push to close. After years of wind-driven storms and temperature swings, the sealant loses its flexibility and starts pulling away in thin strands. Owners might notice a faint draft on windy days, a musty smell near the sill, or even tiny bubbles under the paint along the bottom edge of the trim. It's rarely dramatic at first, but those small openings let water creep behind the siding and into the sheathing.
Up on the roof, the signs are easier to overlook until a leak shows up on the ceiling. But from the ground, homeowners often see granules collecting in the gutters or a patch of shingles that looks darker than the rest after a rain—areas where the mineral surface has worn thin and the asphalt is absorbing water instead of shedding it. Flashing around chimneys and vents starts to lift or corrode, especially near the coast where salt spray accelerates the damage. The first heavy downpour after a long dry spell is usually when owners finally connect those small changes to a bigger problem: the exterior envelope isn't as tight as it used to be, and every season of harsh weather has been quietly taking a toll.
FAQ
Look for a supplier that offers multiple mesh sizes and wire gauges, not just a one-size-fits-all roll. A good one will ask about the bird species you're dealing with and suggest the right opening size, because a sparrow needs a much finer mesh than a pigeon. Also check if they provide custom cutting or pre-sized panels to reduce your installation time.
It depends on your environment. Galvanized mesh works fine for most residential and agricultural settings, but if you're near the coast or in a humid area, stainless steel resists rust far longer and won't leave ugly stains on building facades. For long-term installations where appearance matters, the upfront cost usually pays off.
Many people handle small areas like vents, eaves, and garden enclosures on their own with basic tools like tin snips and a staple gun. For larger commercial buildings or high-rise areas, hiring a team with lift equipment is safer. A reliable supplier often shares simple installation guides and will cut pieces to your exact dimensions so you aren't wrestling with a huge roll.
For sparrows and starlings, you generally want openings no larger than 19 mm (about 3/4 inch). For pigeons, 50 mm (2 inches) is usually enough. If you're unsure, take photos of the birds or describe them to the supplier, and they should help you narrow down the right size instead of just pushing a generic product.
With a proper galvanized coating or stainless steel construction, a good bird mesh should last 10 to 15 years or more without significant degradation. Cheaper options may start rusting within a few years, especially where the wire is cut or bent. Ask about the coating thickness or grade, and look for mesh that stays flexible rather than becoming brittle.
No, the open weave of bird mesh is designed to let air and light pass through while blocking birds and larger pests. This makes it a better choice than solid sheet metal or plywood for vents, because you keep ventilation without inviting nesting. Just make sure the mesh isn't so fine that it traps dust and debris.
Yes, but you need the right prep and paint. Galvanized mesh should be wiped down and primed with a metal primer before painting, otherwise the paint may flake. Powder-coated mesh is available in colors like black, white, and gray from some suppliers and tends to blend into the background much better, especially on modern facades.
Conclusion
Finding a bird mesh supplier that actually understands the daily pressure of keeping birds safe means looking beyond the spec sheet. Galvanized wire holds up because the zinc layer bonds to the steel in a way that cheap PVC-coated alternatives simply can't match once a raccoon starts working at a seam. We've cut panels to fit odd angles in flight cages and run them straight through backyard coops where owners had struggled with gaps near the foundation. One thing that consistently shows up in project notes is how much difference the right gauge makes—going from a flimsy 19-gauge to a 16-gauge often stops a determined fox before it gets past the first twist.
Installation doesn't have to be a weekend-long headache if the supplier pre-cuts lengths to your layout. You can secure panels with stainless steel hog rings instead of weaving every joint by hand, and still keep the enclosure tight enough that a weasel can't squeeze through. After several seasons of rain, snow, and salt air, owners tend to notice the galvanized coating dulls but doesn't flake away like thinner electroplated wire. The edges stay firm, the mesh doesn't sag, and the birds remain out of reach. That kind of quiet performance is what separates a top-quality supplier from a generic hardware store roll.
Contact Us
Contact Person: Nancy
Email: [email protected]
Tel/WhatsApp: +86-13365923720
Website: https://www.topfencesolar.com/